
Millions of data records are being generated every single day in today’s computing systems. These include your financial transactions, placing an order, or data from your car sensor. To process these data streaming events in real-time and to reliably move event records between different enterprise systems, you need Apache Kafka.
Apache Kafka is an open-source data-streaming solution that handles over 1 million records per second. Alongside this high throughput, Apache Kafka provides high scalability and availability, low latency, and permanent storage.
Companies like LinkedIn, Uber, and Netflix rely on Apache Kafka for real-time processing and data streaming. The easiest way for getting started with Apache Kafka is to have it up and running on your local machine. This allows you to not only see the Apache Kafka server in action but also lets you produce and consume messages.

With hands-on experience in starting the server, creating topics, and writing Java code using the Kafka client, you’ll be ready to use Apache Kafka to fulfill all your data pipeline needs.
How to Download Apache Kafka on your local machine
You can download the latest version of Apache Kafka from the official link. The downloaded content will be compressed in .tgz format. Once downloaded, you’ll have to extract the same.
If you are Linux, open your terminal. Next, navigate to the location where you have downloaded the Apache Kafka compressed version. Run the following command:
tar -xzvf kafka_2.13-3.5.0.tgzAfter the command completes, you’ll find that a new directory called kafka_2.13-3.5.0. Navigate inside the folder using:
cd kafka_2.13-3.5.0You can now list the contents of this directory using the ls command.
For Windows users, you can follow the same steps. If you are unable to find the tar command, you may use a third-party tool like WinZip to open the archive.
How to start Apache Kafka on your local machine
After you’ve downloaded and extracted Apache Kafka, it’s time to start running it. It does not have any installers. You can directly start using it via your command line or terminal window.
Before starting with Apache Kafka, ensure you have Java 8+ installed on your system. Apache Kafka requires a running Java installation.
#1. Run the Apache Zookeeper server
The first step is running Apache Zookeeper. You get it pre-downloaded as a part of the archive. It’s a service that is responsible for maintaining configurations and providing synchronization for other services.
Once you’re inside the directory where you have extracted the contents of the archive, run the following command:
For Linux users:
bin/zookeeper-server-start.sh config/zookeeper.propertiesFor Windows users:
bin/windows/zookeeper-server-start.bat config/zookeeper.properties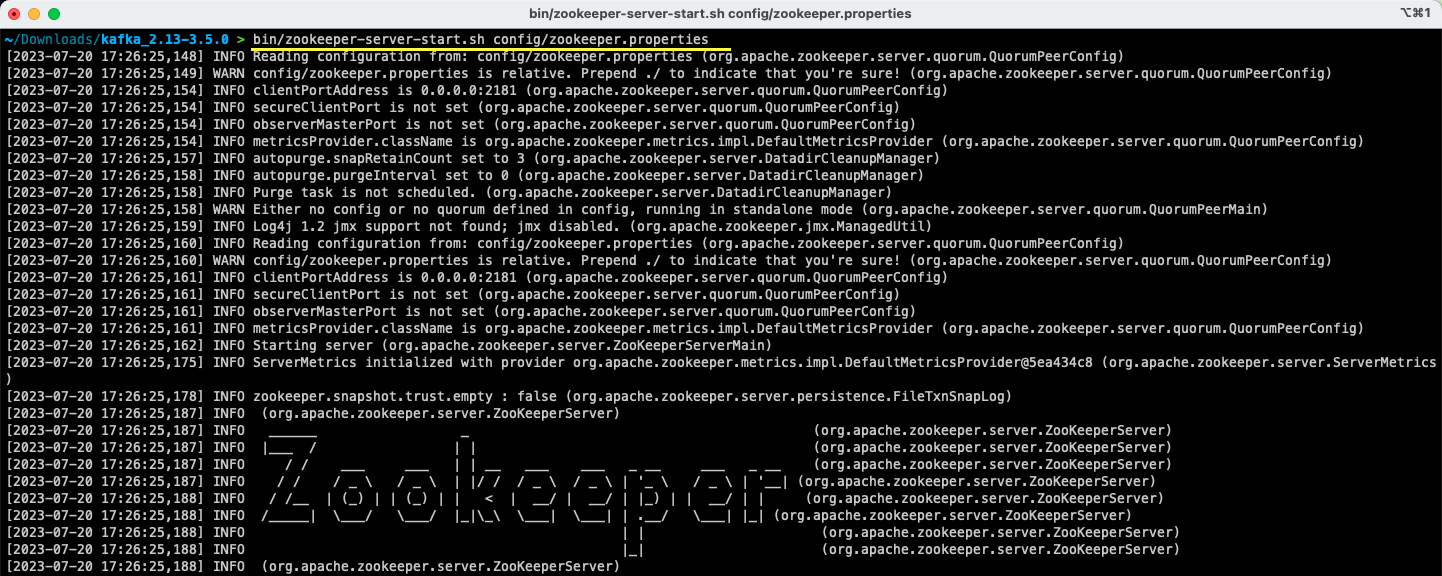
The zookeeper.properties file provides the configurations for running the Apache Zookeeper server. You can configure properties like the local directory where the data will be stored and the port on which the server will be running.
#2. Start the Apache Kafka server
Now that the Apache Zookeeper server has been started, it’s time to start the Apache Kafka server.
Open up a new terminal or command prompt window and navigate to the directory where the extracted files are present. Then you can start the Apache Kafka server using the command below:
For Linux users:
bin/kafka-server-start.sh config/server.propertiesFor Windows users:
bin/windows/kafka-server-start.bat config/server.propertiesYou have your Apache Kafka server running. In case you want to change the default configuration, you can do so by modifying the server.properties file. The different values are present in the official documentation.
How to Use Apache Kafka on your local machine
You’re now ready to start using Apache Kafka on your local machine to produce and consume messages. Since the Apache Zookeeper and Apache Kafka servers are up and running, let’s see how you can create your first topic, produce your first message, and consume the same.
What are the steps to create a topic in Apache Kafka?
Before you create your first topic, let’s understand what a topic actually is. In Apache Kafka, a topic is a logical data store that helps in data streaming. Think of it as the channel through which data is transported from one component to the other.
A topic supports multi-producers and multi-consumers – more than one system can write and read from a topic. Unlike other messaging systems, any message from a topic can be consumed more than once. Additionally, you can also mention the retention period for your messages.
Let’s take the example of a system (producer) that produces data for bank transactions. And another system (consumer) consumes this data and sends an app notification to the user. In order to facilitate this, a topic is required.
Open up a new terminal or command prompt window, and navigate to the directory where you’ve extracted the archive. The following command will create a topic called transactions:
For Linux users:
bin/kafka-topics.sh --create --topic transactions --bootstrap-server localhost:9092For Windows users:
bin/windows/kafka-topics.bat --create --topic transactions --bootstrap-server localhost:9092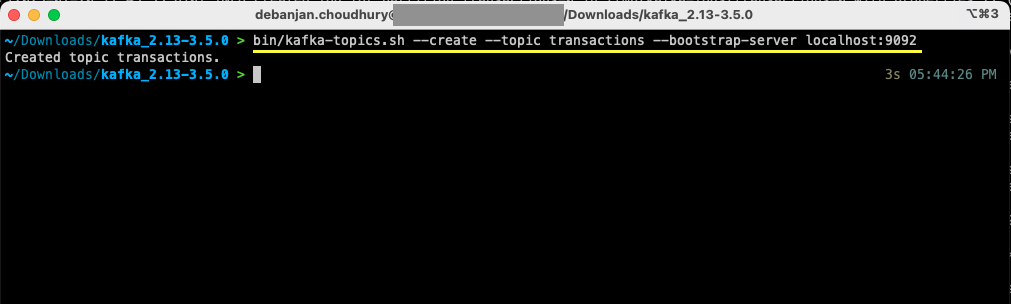
You’ve now created your first topic, and you’re ready to start producing and consuming messages.
How to produce a message to Apache Kafka?
With your Apache Kafka topic ready, you can now produce your first message. Open up a new terminal or command prompt window, or use the same one you’ve used to create the topic. Next, ensure that you’re in the proper directory where you’ve extracted the contents of the archive. You can use the command line to produce your message on the topic using the following command:
For Linux users:
bin/kafka-console-producer.sh --topic transactions --bootstrap-server localhost:9092For Windows users:
bin/windows/kafka-console-producer.bat --topic transactions --bootstrap-server localhost:9092Once you run the command, you’ll see that your terminal or command prompt window is waiting for input. Write your first message and hit Enter.
> This is a transactional record for $100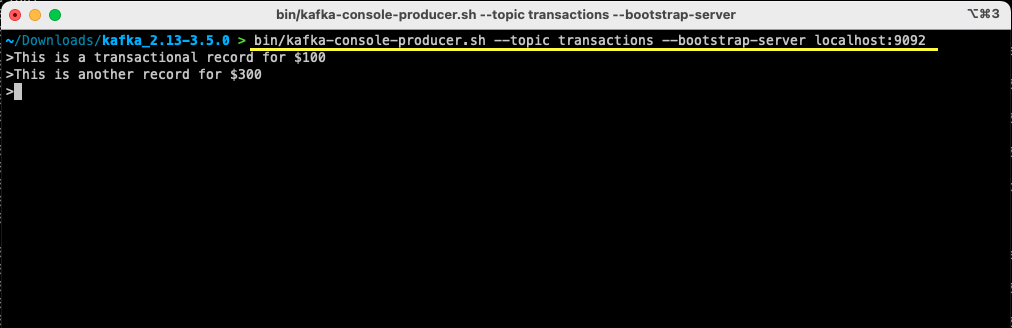
You’ve produced your first message to Apache Kafka on your local machine. Subsequently, you’re now ready to consume this message.
How to consume a message from Apache Kafka?
Provided that your topic has been created and you’ve produced a message to your Kafka topic, you can now consume that message.
Apache Kafka allows you to attach multiple consumers to the same topic. Each consumer can be part of a consumer group – a logical identifier. For example, if you have two services that need to consume the same data, then they can have different consumer groups.
However, if you have two instances of the same service, then you’d want to avoid consuming and processing the same message twice. In that case, both of them will have the same consumer group.
In the terminal or command prompt window, ensure you’re in the proper directory. Use the following command to start the consumer:
For Linux users:
bin/kafka-console-consumer.sh --topic transactions --from-beginning --bootstrap-server localhost:9092 --group notif-consumerFor Windows users:
bin/windows/kafka-console-consumer.bat --topic transactions --from-beginning --bootstrap-server localhost:9092 --group notif-consumer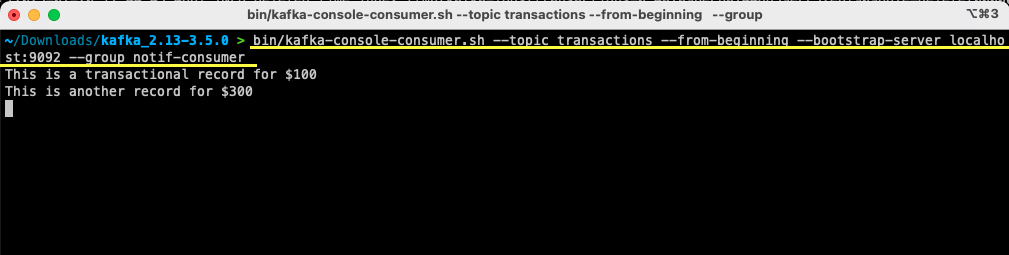
You’ll see the message you’ve previously produced appear on your terminal. You’ve now used Apache Kafka to consume your first message.
The kafka-console-consumer command takes a lot of arguments passed in. Let’s see what each of them means:
- The
--topicmentions the topic from where you’ll be consuming --from-beginningtells the console consumer to start reading messages right from the first message present- Your Apache Kafka server is mentioned via the
--bootstrap-serveroption - Additionally, you can mention the consumer group by passing the
--groupparameter - In the absence of a consumer group parameter, it is auto-generated
With the console consumer running, you can try producing new messages. You’ll see that all of them are consumed and show up in your terminal.
Now that you’ve created your topic and successfully produced and consumed messages, let’s integrate this with a Java application.
How to create Apache Kafka producer and consumer using Java
Before you begin, ensure you have Java 8+ installed on your local machine. Apache Kafka provides its own client library that allows you to connect seamlessly. If you’re using Maven to manage your dependencies, then add the following dependency to your pom.xml
<dependency>
    <groupId>org.apache.kafka</groupId>
    <artifactId>kafka-clients</artifactId>
    <version>3.5.0</version>
</dependency>
You can also download the library from the Maven repository and add it to your Java classpath.
Once your library is in place, open up a code editor of your choice. Let’s see how you can start up your producer and consumer using Java.
Create Apache Kafka Java producer
With the kafka-clients library in place, you’re now ready to start creating your Kafka producer.
Let’s create a class called SimpleProducer.java. This will be responsible for producing messages on the topic that you have created earlier. Inside this class, you’ll be creating an instance of org.apache.kafka.clients.producer.KafkaProducer. Subsequently, you’ll use this producer to send your messages.
For creating the Kafka producer, you require the host and port of your Apache Kafka server. Since you’re running it on your local machine, the host will be localhost. Given that you’ve not changed the default properties when starting up the server, the port will be 9092. Consider the following code below that’ll help you create your producer:
package org.example.kafka;

import org.apache.kafka.clients.producer.KafkaProducer;
import org.apache.kafka.clients.producer.ProducerConfig;
import org.apache.kafka.clients.producer.ProducerRecord;
import org.apache.kafka.clients.producer.RecordMetadata;
import org.apache.kafka.common.serialization.StringSerializer;

import java.util.Properties;
import java.util.concurrent.ExecutionException;
import java.util.concurrent.Future;

public class SimpleProducer {

    private final KafkaProducer<String, String> producer;

    public SimpleProducer(String host, String port) {
        String server = host + ":" + port;
        Properties properties = new Properties();
        properties.setProperty(ProducerConfig.BOOTSTRAP_SERVERS_CONFIG, server);
        properties.setProperty(ProducerConfig.KEY_SERIALIZER_CLASS_CONFIG, StringSerializer.class.getName());
        properties.setProperty(ProducerConfig.VALUE_SERIALIZER_CLASS_CONFIG, StringSerializer.class.getName());
        this.producer = new KafkaProducer<>(properties);
    }
}
You’ll notice that there are three properties being set. Let’s quickly walk through each of them:
- The BOOTSTRAP_SERVERS_CONFIG lets you define where the Apache Kafka server is running
- The KEY_SERIALIZER_CLASS_CONFIG tells the producer what format to use for sending the message keys.
- The format for sending the actual message is defined using the VALUE_SERIALIZER_CLASS_CONFIG property.
Since you’ll be sending text messages, both of the properties are set to use StringSerializer.class.
In order to actually send a message to your topic, you need to use the producer.send() method which takes in a ProducerRecord. The following code gives you a method that will send a message to the topic and print the response along with the message offset.
public void produce(String topic, String message) throws ExecutionException, InterruptedException {
    ProducerRecord<String, String> record = new ProducerRecord<>(topic, message);
    final Future<RecordMetadata> send = this.producer.send(record);
    final RecordMetadata recordMetadata = send.get();
    System.out.println(recordMetadata);
}
With the entire code in place, you can now send messages to your topic. You can use a main method to test this out, as presented in the code below:
package org.example.kafka;
import org.apache.kafka.clients.producer.KafkaProducer;
import org.apache.kafka.clients.producer.ProducerConfig;
import org.apache.kafka.clients.producer.ProducerRecord;
import org.apache.kafka.clients.producer.RecordMetadata;
import org.apache.kafka.common.serialization.StringSerializer;
import java.util.Properties;
import java.util.concurrent.ExecutionException;
import java.util.concurrent.Future;
public class SimpleProducer {
private final KafkaProducer<String, String> producer;
public SimpleProducer(String host, String port) {
String server = host + ":" + port;
Properties properties = new Properties();
properties.setProperty(ProducerConfig.BOOTSTRAP_SERVERS_CONFIG, server);
properties.setProperty(ProducerConfig.KEY_SERIALIZER_CLASS_CONFIG, StringSerializer.class.getName());
properties.setProperty(ProducerConfig.VALUE_SERIALIZER_CLASS_CONFIG, StringSerializer.class.getName());
this.producer = new KafkaProducer<>(properties);
}
public void produce(String topic, String message) throws ExecutionException, InterruptedException {
ProducerRecord<String, String> record = new ProducerRecord<>(topic, message);
final Future<RecordMetadata> send = this.producer.send(record);
final RecordMetadata recordMetadata = send.get();
System.out.println(recordMetadata);
}
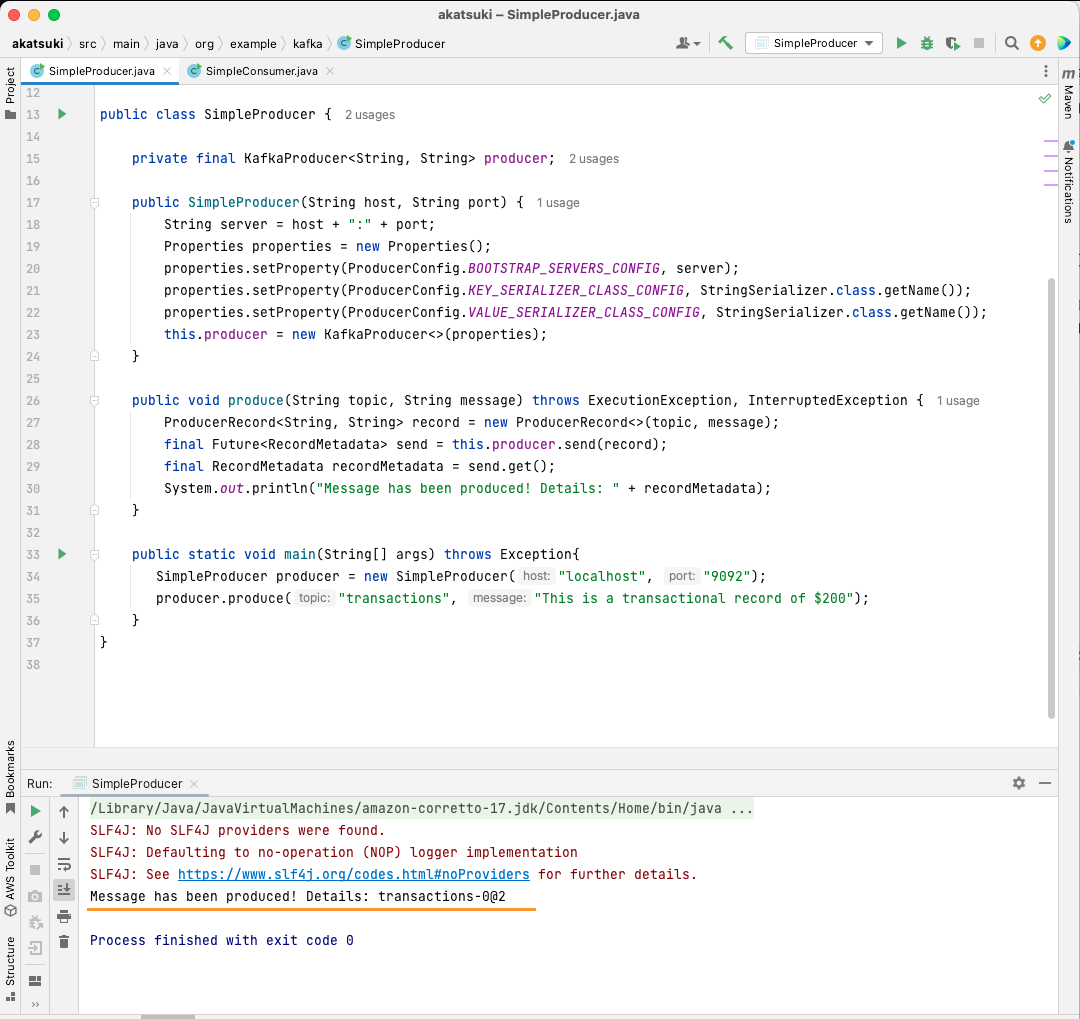
public static void main(String[] args) throws Exception{
SimpleProducer producer = new SimpleProducer("localhost", "9092");
producer.produce("transactions", "This is a transactional record of $200");
}
}
In this code, you’re creating a SimpleProducer that connects to your Apache Kafka server on your local machine. It internally uses the KafkaProducer to produce text messages on your topic.
Create Apache Kafka Java consumer
It’s time to make an Apache Kafka consumer using the Java client. Create a class called SimpleConsumer.java. Next, you’ll create a constructor for this class, which initializes the org.apache.kafka.clients.consumer.KafkaConsumer. For creating the consumer, you require the host and port where the Apache Kafka server runs. Additionally, you require the Consumer Group as well as the topic you want to consume from. Use the code snippet given below:
package org.example.kafka;

import org.apache.kafka.clients.consumer.ConsumerConfig;
import org.apache.kafka.clients.consumer.ConsumerRecords;
import org.apache.kafka.clients.consumer.KafkaConsumer;
import org.apache.kafka.common.serialization.StringDeserializer;

import java.time.Duration;
import java.util.List;
import java.util.Properties;
import java.util.concurrent.atomic.AtomicBoolean;

public class SimpleConsumer {

    private static final String OFFSET_RESET = "earliest";

    private final KafkaConsumer<String, String> consumer;
    private boolean keepConsuming = true;

    public SimpleConsumer(String host, String port, String consumerGroupId, String topic) {
        String server = host + ":" + port;
        Properties properties = new Properties();
        properties.setProperty(ConsumerConfig.BOOTSTRAP_SERVERS_CONFIG, server);
        properties.setProperty(ConsumerConfig.GROUP_ID_CONFIG, consumerGroupId);
        properties.setProperty(ConsumerConfig.AUTO_OFFSET_RESET_CONFIG, OFFSET_RESET);
        properties.setProperty(ConsumerConfig.KEY_DESERIALIZER_CLASS_CONFIG, StringDeserializer.class.getName());
        properties.setProperty(ConsumerConfig.VALUE_DESERIALIZER_CLASS_CONFIG, StringDeserializer.class.getName());
        this.consumer = new KafkaConsumer<>(properties);
        this.consumer.subscribe(List.of(topic));
    }
}
Similar to the Kafka Producer, the Kafka Consumer also takes in a Properties object. Let’s look at all the different properties set:
- BOOTSTRAP_SERVERS_CONFIG tells the consumer where the Apache Kafka server is running
- The consumer group is mentioned using the GROUP_ID_CONFIG
- When the consumer starts consuming, the AUTO_OFFSET_RESET_CONFIG allows you to mention how far back you want to start consuming messages from
- KEY_DESERIALIZER_CLASS_CONFIG tells the consumer the type of the message key
- VALUE_DESERIALIZER_CLASS_CONFIG tells the consumer type of the actual message
Since, in your case, you’ll be consuming text messages, the deserializer properties are set to StringDeserializer.class.
You’ll now be consuming the messages from your topic. In order to keep things simple, once the message is consumed, you’ll be printing the message to the console. Let’s see how you can achieve this using the code below:
private boolean keepConsuming = true;

public void consume() {
    while (keepConsuming) {
        final ConsumerRecords<String, String> consumerRecords = this.consumer.poll(Duration.ofMillis(100L));
        if (consumerRecords != null && !consumerRecords.isEmpty()) {
            consumerRecords.iterator().forEachRemaining(consumerRecord -> {
                System.out.println(consumerRecord.value());
            });
        }
    }
}
This code will keep on polling the topic. When you receive any Consumer Record, the message will be printed. Test out your consumer in action using a main method. You’ll start a Java application that will keep on consuming the topic and printing the messages. Stop the Java application to terminate the consumer.
package org.example.kafka;

import org.apache.kafka.clients.consumer.ConsumerConfig;
import org.apache.kafka.clients.consumer.ConsumerRecords;
import org.apache.kafka.clients.consumer.KafkaConsumer;
import org.apache.kafka.common.serialization.StringDeserializer;

import java.time.Duration;
import java.util.List;
import java.util.Properties;
import java.util.concurrent.atomic.AtomicBoolean;

public class SimpleConsumer {

    private static final String OFFSET_RESET = "earliest";

    private final KafkaConsumer<String, String> consumer;
    private boolean keepConsuming = true;

    public SimpleConsumer(String host, String port, String consumerGroupId, String topic) {
        String server = host + ":" + port;
        Properties properties = new Properties();
        properties.setProperty(ConsumerConfig.BOOTSTRAP_SERVERS_CONFIG, server);
        properties.setProperty(ConsumerConfig.GROUP_ID_CONFIG, consumerGroupId);
        properties.setProperty(ConsumerConfig.AUTO_OFFSET_RESET_CONFIG, OFFSET_RESET);
        properties.setProperty(ConsumerConfig.KEY_DESERIALIZER_CLASS_CONFIG, StringDeserializer.class.getName());
        properties.setProperty(ConsumerConfig.VALUE_DESERIALIZER_CLASS_CONFIG, StringDeserializer.class.getName());
        this.consumer = new KafkaConsumer<>(properties);
        this.consumer.subscribe(List.of(topic));
    }

    public void consume() {
        while (keepConsuming) {
            final ConsumerRecords<String, String> consumerRecords = this.consumer.poll(Duration.ofMillis(100L));
            if (consumerRecords != null && !consumerRecords.isEmpty()) {
                consumerRecords.iterator().forEachRemaining(consumerRecord -> {
                    System.out.println(consumerRecord.value());
                });
            }
        }
    }

    public static void main(String[] args) {
        SimpleConsumer simpleConsumer = new SimpleConsumer("localhost", "9092", "transactions-consumer", "transactions");
        simpleConsumer.consume();
    }
}
When you run the code, you’ll observe that it not only consumes the message produced by your Java producer but also the ones you’ve produced via the Console Producer. This is because the AUTO_OFFSET_RESET_CONFIG property has been set to earliest.
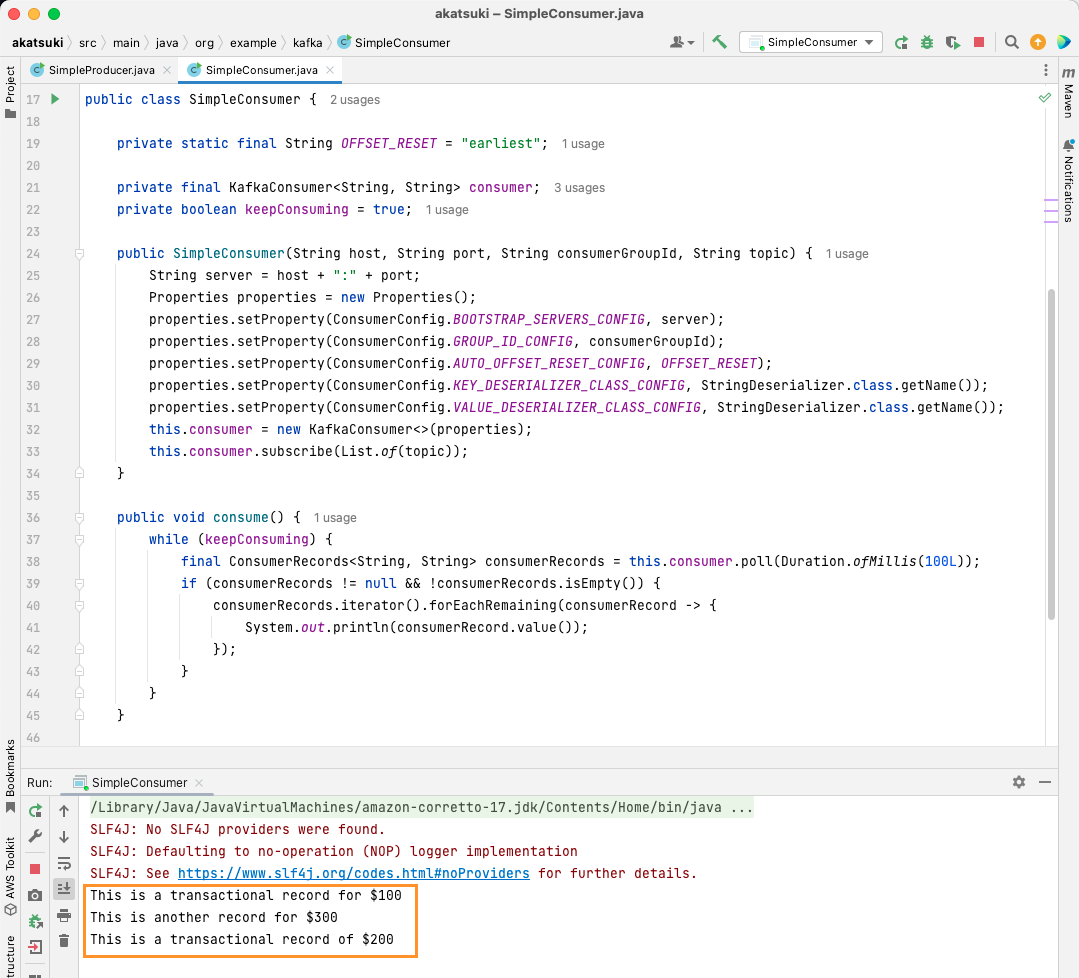
With the SimpleConsumer running, you can use the console producer or the SimpleProducer Java application to produce further messages to the topic. You’ll see them being consumed and printed on the console.
Meet all your data pipeline needs with Apache Kafka
Apache Kafka lets you handle all your data pipeline requirements with ease. With Apache Kafka setup on your local machine, you can explore all the different features that Kafka provides. Additionally, the official Java client lets you write, connect, and communicate with your Apache Kafka server efficiently.
Being a versatile, scalable, and highly performant data streaming system, Apache Kafka can genuinely be a game changer for you. You can use it for your local development or even integrate it into your production systems. Just like it’s easy to set up locally, setting Apache Kafka for bigger applications is no big task.
If you’re looking for data streaming platforms, you can look at the best streaming data platforms for Real-Time Analysis and Processing.