
I always find it strange when the topic of low storage comes up, and people throw around the advice to delete large/unused data to free up space. I mean, yes, deleting data leads to freeing up space, but why would I delete my personal data? It’s there on my PC for a reason, even if I immediately don’t need it.
I usually have low space on my work PC since it only has a 128GB SSD. Of course, I can’t delete my data on it since it’s important for my work. So I have configured Windows and my data to use minimum space, and I also occasionally delete unrequired Windows/app data.
You can actually free lots of space without even touching your personal data and apps. In this post, I’ll show you multiple methods you can use to free up space in Windows 11.
Note: For demonstration, I am going to use my 128GB SSD, which is over 80% filled with data. I have reset all the optimizations so you could see how much space each tweak saves. Depending on your drive size and data, your mileage may vary.
Compress Data
Windows has a built-in compress feature that compresses and decompresses your data on the fly to save space without any noticeable impact on performance. Once enabled, it will find repetitive and redundant characters/blocks in the data to remove or categorize them to decrease how much space they take on the drive.
You can compress a file, folder, or even the whole drive. Although there is no limit on which data you can compress, you should still not compress system files as it could cause errors and performance issues. Besides, Windows has a dedicated compression feature for system files; more on it later.
Right-click on the file, folder, or drive you want to compress and select Properties from the context menu. Here click on the Advanced button under the General tab.
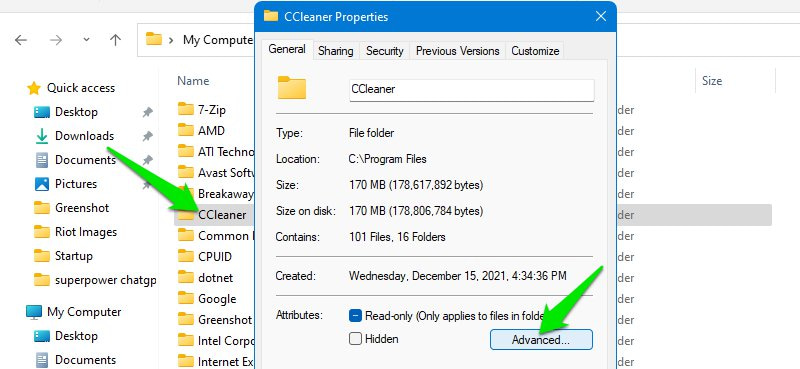
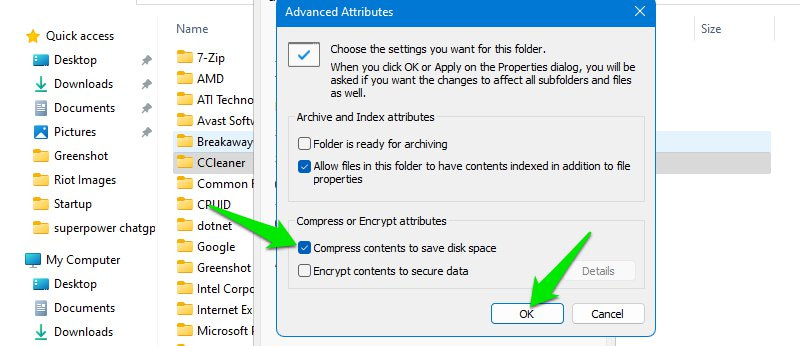
Now check the checkbox next to the Compress contents to save disk space option and click on OK.
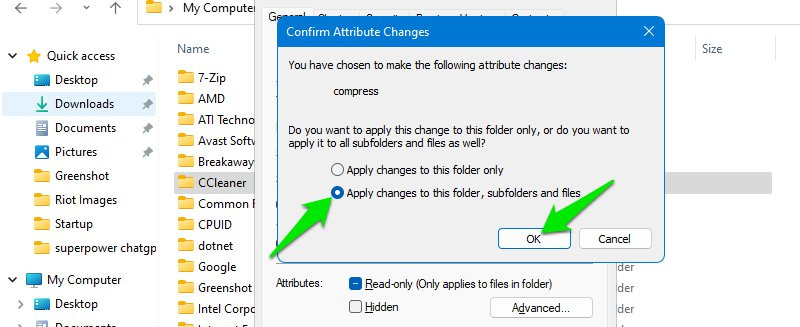
Afterward, click on Apply and confirm the prompt while the Apply changes to this folder, subfolders, and files option is selected.
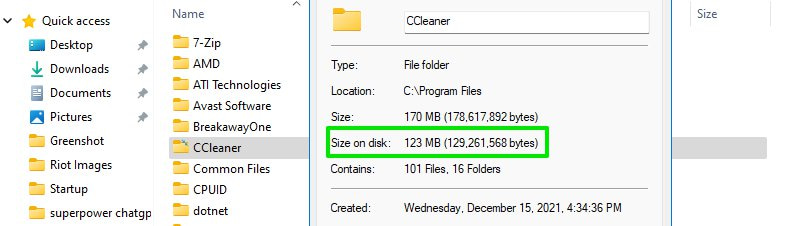
Depending on the data, it will take some time to compress all the data and you should see the Size on disk option decrease.
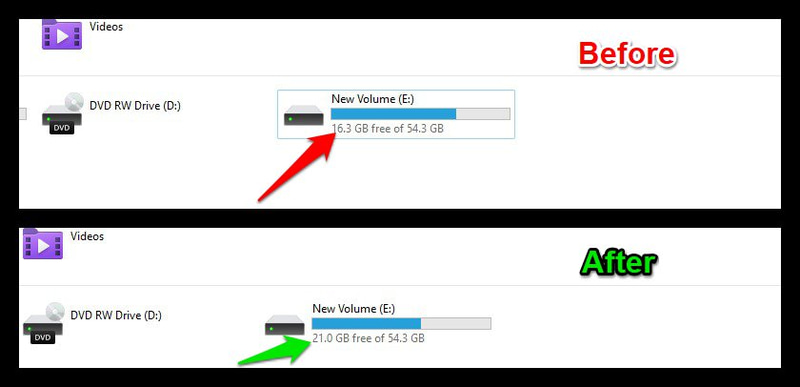
For demonstration, I compressed my whole E drive which had 54.3GB total space with 16.3GB free space. It took about 20min to compress it and after compression, I had 21GB of free space.
I also didn’t notice any degradation in performance. I actually had a game on it that doesn’t even work on an HDD because it continuously exchanges data between storage and RAM.
I didn’t notice any slowdown in the game, including loading screens. However, if you have an HDD, you might see a higher impact on performance as it’s much slower.
If you face a problem, you can undo the changes we did above, and it will decompress the data; it will take a similar time to decompress too.
Enable Windows Compact OS
Compact OS is a feature of Windows 10 and 11 to decrease operating system footprint on the drive by smartly compressing data at different access levels to ensure lower OS size without much impact on performance. It also automatically manages new updates and files added to the system to ensure the OS is always optimized.
To turn on the feature, search for CMD in Windows search and then right-click on Command Prompt and select Run as administrator. This will open an elevated Command Prompt, which is a requirement for the next command.
Here enter the below-mentioned command and hit Enter:
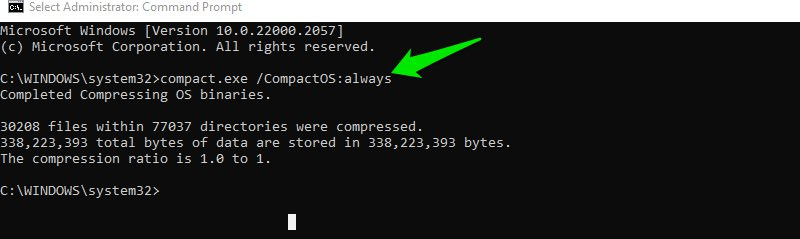
compact.exe /CompactOS:always
The process will take some time (30min for me) and tell you exactly how much data has been compressed.
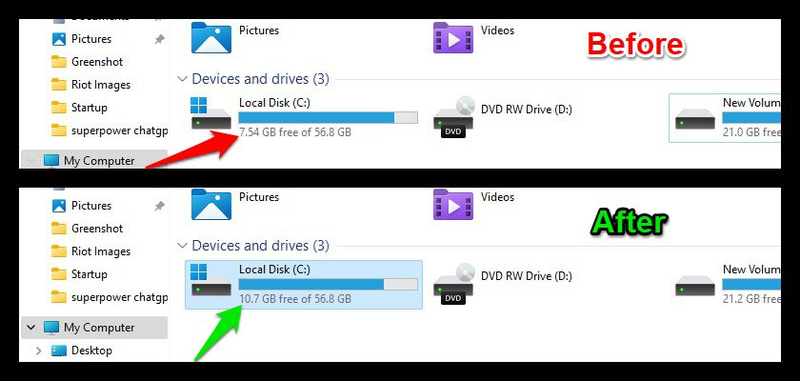
I had 7.54GB free space in my system drive before enabling Compact OS. After compression, I had 10.7GB of free space. Although I had to restart the PC to see the released space.
If you want to undo the changes, then go through the above process but use the below-mentioned command instead:
compact.exe /CompactOS:never
Remove Updates Leftover Data
Windows updater downloads an executable file when it needs to update. Windows doesn’t delete that executable file after installation, so it could be used in case you need to roll back.
This is true for Windows version upgrades as well, such as upgrading from Windows 10 to Windows 11. It will keep Windows 10 on your PC just in case you need to roll back.
If you have no problem with the current Windows version and update, you can remove the previous data to free lots of space. Here’s how to do it:
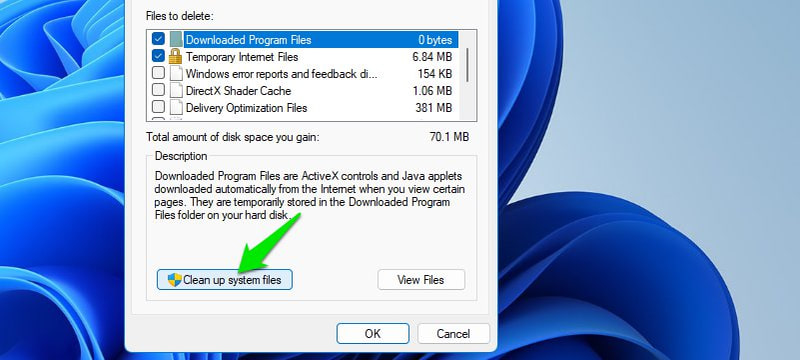
Search Disk Cleanup in Windows search and open the app. Select your system drive (usually C) and then click on the Clean up system files button.
Now check the checkbox next to the Windows Update Cleanup option and also the Windows.old option (if you upgraded from a previous version). Afterward, click on OK and this data will be deleted.
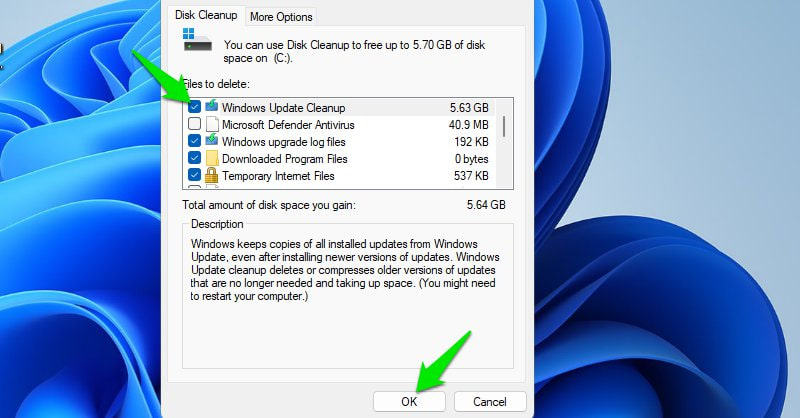
In my case, my Windows Update Cleanup data was 5.63GB. I didn’t have Windows.old data since I deleted it after upgrading to Windows 11. Although, from what I remember, it was 12GB in size. Your’s should be similar in size too.
This process can not be undone, Windows will have to download the update again in case of any rollbacks.
Use a Junk Cleaner App
When you use the PC, Windows, apps, and the browser generate temporary data that could be useful to speed up things when accessed again. However, they can easily take up multiple GBs of space. Cleaning this data from time to time is a good habit to both clean up the PC and boost performance.
CCleaner is a great PC optimizer app that can search and clean all the junk data on your PC. Although there are a lot of options to choose from when deleting data, I’ll recommend you stick to the default selected options, as some of these options can negatively impact your experience.
First, use the Analyze button to see all the data that gets selected to be deleted. You can right-click and choose the Add to Exclude list option on any data you don’t want to be deleted. Afterward, click on Run Cleaner to delete the selected data.
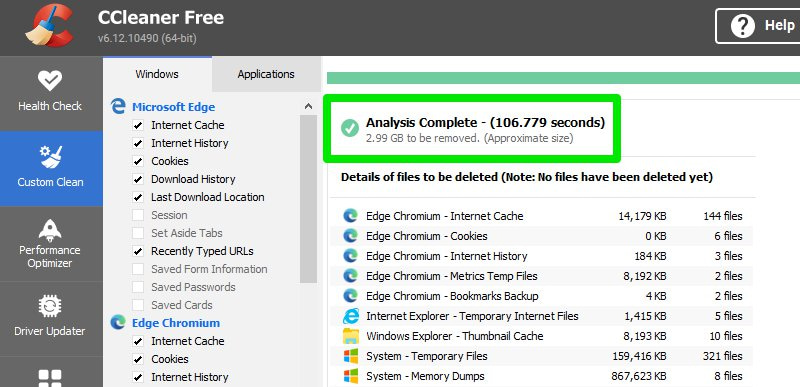
I currently have 2.99GB of junk data to remove. On average, I have 1.5-4GB of data to delete every few weeks.
Manage Restore Points Storage
By default, Windows marks 3% of the total storage space to be used by System Restore. Windows keeps making restore points until that space is filled and then deletes the oldest restore points to make space for new ones. It lets you easily roll back your PC to a previous state in case of a problem.
However, that 3% isn’t a must; you can decrease that space and still have enough old restore points to choose from in case of a problem. Here’s how to do it:
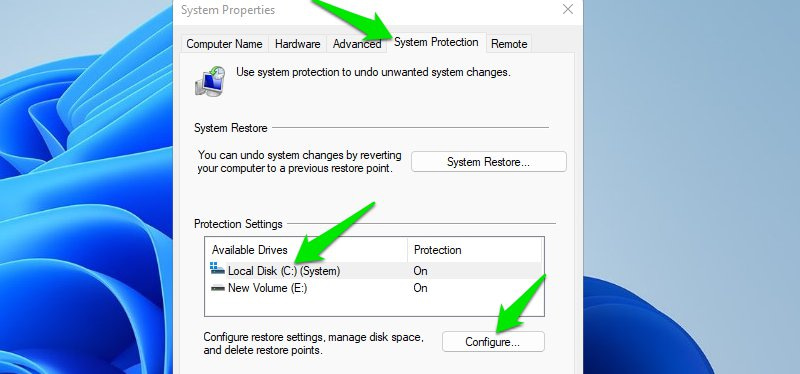
Press the Windows+R keys to open the Run dialog and type sysdm.cpl to open System Properties. Here move to the System Protection tab and click on Configure while one of the drives is selected.
Now decrease the size of the Max Usage option to 2% or even 1%, and it should significantly decrease space consumed by restore points. Repeat the process for all drives to free up space in all.
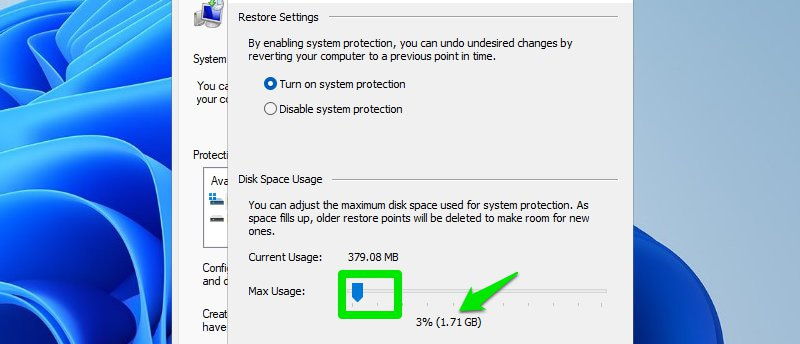
I personally set it to 1%, and my C drive went from 1.71GB to 582MB, and my E drive went from 1.39GB to 556MB. This should store 2-3 medium size restore points in case I need to roll back.
Manage Pagefile
Pagefile is the virtual memory that Windows utilizes to store lower-priority processes on a storage drive to free up RAM. It’s a great way to ensure system stability, but it also takes up a lot of storage space.
The pagefile is managed by Windows by default, and it’s usually 1.5 times the size of PC RAM, i.e. 24GB if you have 16GB RAM.
However, Windows manages it dynamically, so it can significantly decrease the pagefile size if it notices you have less storage space and your usage pattern doesn’t require large virtual memory.
Whatever the pagefile size may be, it will still be a few GBs, and managing it can help gain some space. You can manually decrease the size, move it to a different drive, or disable it if you have enough RAM.
To manage the page file, open up the Run dialog by pressing the Windows+R keys and then enter SystemPropertiesPerformance.exe to open Performance Options. Here move to the Advanced tab and click on the Change button under the Virtual memory section.
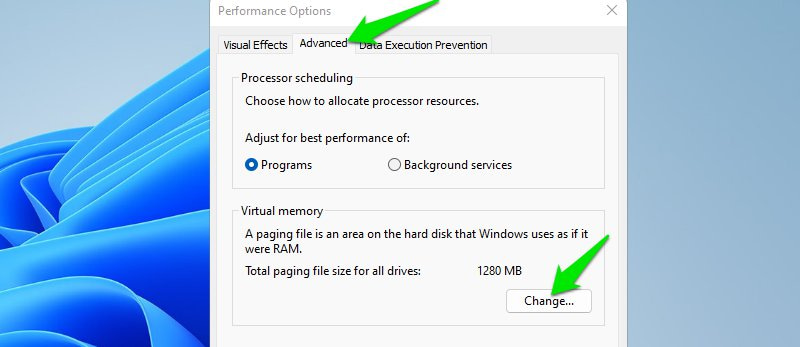
Now uncheck the Automatically manage paging file size for all drives option so you could manually make the below-mentioned edits:

Set Custom Size
You can set a custom size so it only takes a small space in your drive and only takes higher space when needed. Just select the Custom size option here and set Initial size and Maximum size.
The initial size will be the size of pagefile in regular use, and the maximum size is the size Windows can increase up to when needed. You must click the Set button afterward to apply the change.
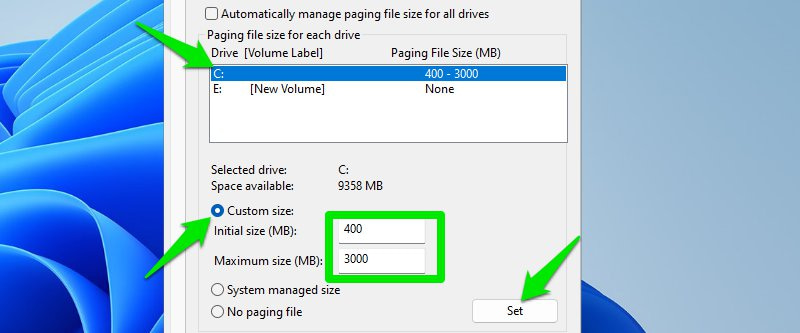
For me, 400MB minimum and 3GB maximum work fine. I have less workload so my 8GB RAM is enough to handle it. Although you can set a higher maximum value if you have a higher workload. The point is to have a lower initial size so you can save storage under normal circumstances.
Move Pagefile to a Different Drive
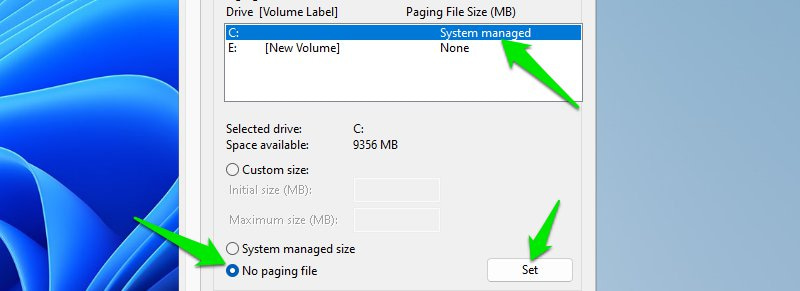
Pagefile is usually in the system drive. If you have less space there and want to move it to a different drive to make space, then that’s possible. First, select the drive where the pagefile is located and then select No paging file and click on Set.
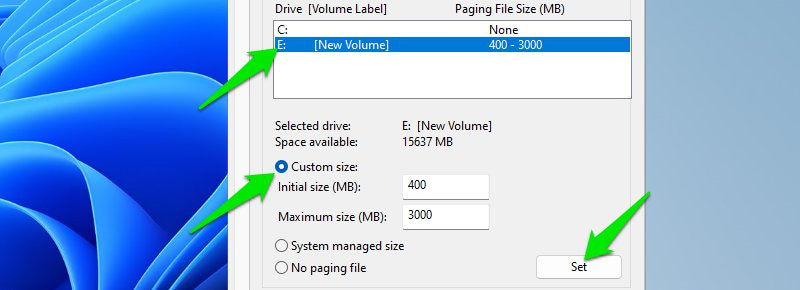
Afterward, select the drive where you want to place the pagefile and either select System managed size or Custom size as per your need.
Disable Pagefile
I won’t recommend you disable the pagefile since it greatly helps your RAM and ensures your PC doesn’t crash under load. However, if you have high enough RAM, then you can try disabling it to gain some space.
Just like above, select the drive where the pagefile is located and then select the No paging file option and click on Set.
For me, Windows recommends a 1914MB pagefile size, and it stays at that value usually. Although it does changes based on my activity sometimes, like it’s 1280MB while taking the below screenshot.

Disable Hibernate Feature
Many people, if not most, don’t use the hibernate feature as the sleep functions work fine for temporarily leaving the PC and we usually shut down the PC when we are done using it.
If you don’t use the hibernate feature either, then disable it and remove hiberfil.sys file to free up lots of space.
Hiberfil.sys is the file used to store hibernate data, and it’s usually 75% the size of your total RAM when all conditions are favorable. You can free up all that space by getting rid of it. Here’s how:
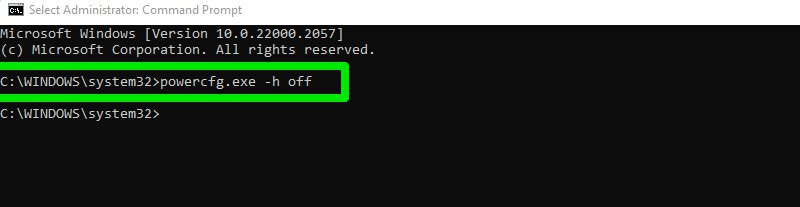
Open up an elevated Command Prompt window as we did above and enter the below command:
powercfg.exe -h off
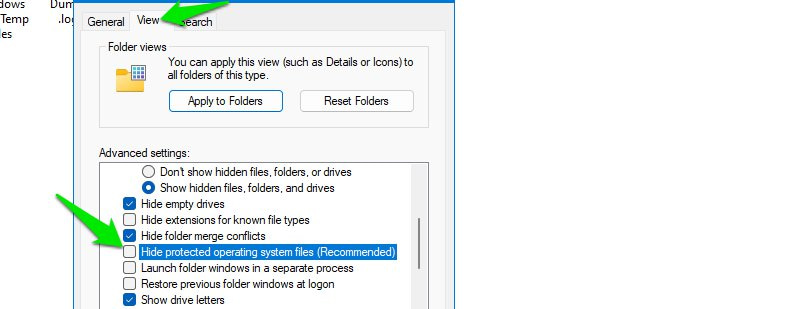
This will disable the hibernate option. Now move to the system drive in Windows Explorer and click on the three dots menu at the top and select Options from it.

Here move to the View tab and uncheck the checkbox next to the Hide protected operating system files option.
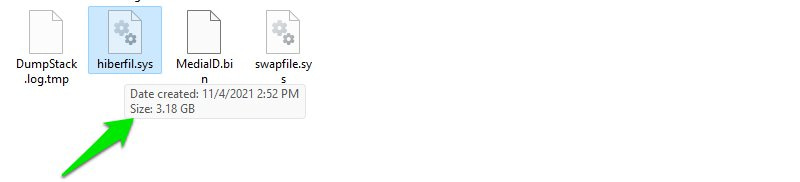
Just look for hiberfil.sys file in the system drive and delete it like you delete a regular file. You must have admin privileges to delete it, though, or you can use an unlocker app.
My hiberfil.sys file is 3.18GB in size, I guess it’s small due to my limited storage.
If you want to enable the hibernate feature again, then open an elevated Command Prompt window and run the below-mentioned commands one after another.
powercfg /hibernate on
powercfg /h /type full
The first one will enable the hibernate mode, and the second one will create a new hiberfil.sys file.
How Much Space is Freed?
*Takes out the calculator* so if we combine the above gains, 23.12GB is the total space I gained following all the above methods using the least favorable conditions. I gained this space without deleting my personal data on a PC with only a 128GB SSD and 8GB RAM.
The methods I have mentioned directly scale with storage and RAM size, so you’ll see much better results if you have more storage and RAM. Furthermore, if you haven’t optimized your PC for a while, then you’ll also gain significantly higher space when deleting Windows updates and junk data.
Bonus Tips
Below are some tips that can help better manage space in a Windows PC:
- Enable Storage Sense by going to Settings > System > Storage. This automatically deletes junk data at a specific time interval or when low on storage.
- Move media files like images and videos to external storage or cloud storage.
- Use a third-party uninstaller app like IObit Uninstaller since they also delete residual data.
- Most online games leave behind data after each patch. Usually, it can be found in the data, patch, game, or client folder. You’ll have to search online to see if your games leave patch data.
- Most of the data in the Downloads folder is useless since there are usually used installers or zip files. You can search through it to delete data.
- If you can afford to delete personal data, then WinDirStat can greatly help in finding large files.
- And of course, don’t forget to delete data in the Recycle Bin when low on storage.
Final Thoughts 💭
I have a bunch of apps that I only use when I have to write a post regarding them, such as Google Chrome. Yes, I can delete such apps, but having to download them again every few months is a bit annoying. The methods above ensure I have enough space to take care of my work without any hiccups.
If you run low on storage even after following these methods, then it would be best to get better storage.